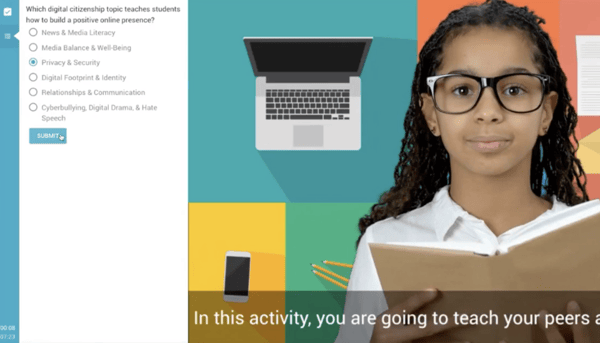
 Click the image above to see a preview of WeVideo Interactivity!
You’ve made your first instructional video, or perhaps you’ve been making them for years. Regardless—it’s time to take the next step in your multimedia creation journey and learn how to make an interactive video.
Interactive videos aren’t as difficult to make as they may seem. And the benefits? Boundless. Read on to learn about:
- What is an interactive video?
- Types of interactive videos
- Why make interactive videos?
- How to make an interactive video in WeVideo
What is an interactive video?
An interactive video is a form of multimedia where users can interact with content within the video.
Sure, standard video offers basic interactions—viewers can stop content, pause, or press play to continue. But interactive videos take things to the next level. They allow you to include clickable information in your content, embed question sets, scope and sequence video lessons, and get real-time viewer/learner data.
In WeVideo Interactivity, we refer to interactive videos as Bulbs. Every time you create a Bulb, or interactive video, you’re given access to a host of customization options to create better learner engagement, retention, and performance.
Types of interactive videos
Let’s take a closer look at what types of interactive videos you can make.
1. Question sets
WATCH: How to add interactions in WeVideo Interactivity.
One of the most popular interactive video types involves layering question sets and other resources into your video content. Think multiple choice questions, discussions, polls, and free response—depending on your learning objectives.
You can also embed web pages, if you have supplemental resources to share.
2. Playlists
WATCH: New to playlists? Start with this quick explainer.
Once you get in the habit of making interactive videos, playlists allow you to transform them into sequenced lessons or full-on digital courses.
Say you have a unit on the scientific method that’s chock-full of video content. Using WeVideo Interactivity’s playlist feature, you can bundle this content into a series of videos for learners to work through at their own pace!
Or maybe you’re teaching in a flipped classroom environment—playlists are perfect for learners to use at home, before or after in-person lessons.
3. Branched pathways
WATCH: How to create branched learning opportunities for your learners.
Branched pathways are the choose-your-own-adventures of interactive video. Essentially, how a learner interacts with your content depends where they go next. This gives more autonomy to learners, as well as allows you to accommodate a variety of knowledge levels and scaffold effectively, all within a single video.
Even better—creating these pathways doesn’t involve a trundle of complicated programming and logic settings. With the Jump feature, you can quickly create branched workflows that adjust to learners’ needs and abilities.
Get a question correct? Good, maybe they jump ahead in your video content. Wrong? Keep watching. Wrong again? Rewatch from the beginning. And so on and so on.
Branched pathways allow you to create instant engagement with a medium learners love AND still differentiate your instruction!
4. Learner-Made Bulbs
Think of LMBs the same way you would any other interactive video, only instead of being made by you, they’re made by your learners.
Learner-Made Bulbs transform learners into educators. They’re great for:
- Project or test reviews, where learners create their own questions
- Boosting engagement, where learners are actively involved in teaching others
- Recording presentations, where learners then reflect on their performance with comments
Why make interactive videos?
If you’re reading this, chances are you already know the impact of standard video on learners (see: deeper learning, retention, and engagement).
Interactive videos take things to the next level, turning passive viewers into active learners, and giving you—the educator—real-time data to enhance future lessons and make necessary instructional decisions.
That’s the real bread-and-butter of making a video interactive—you know the impact your instructional content is having because, well, you see it. Both qualitatively and quantitatively. And that’s a beautiful thing.
An engaging medium, the tools to differentiate instruction and meet the needs of diverse learners, and the results to know what to do next. That’s the power of interactive video.
Now let’s make one, shall we?
How to make an interactive video in WeVideo
What follows are step-by-step instructions for using WeVideo to make an interactive video. If you’re new to WeVideo, welcome! Learn more about WeVideo Interactivity here.
Here’s how to make an interactive video with WeVideo’s tools.
1. Select your video
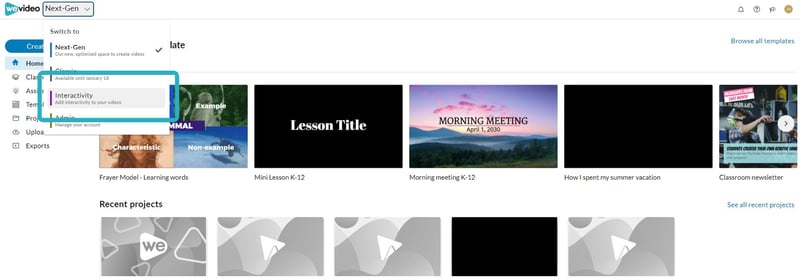
In WeVideo, click the drop-down menu on the top toolbar, then click Interactivity.
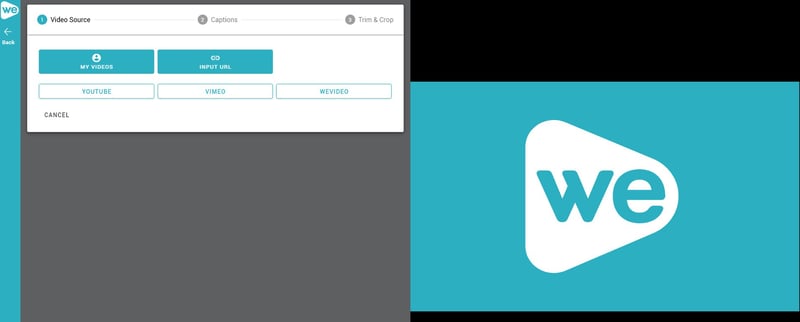
You can add interactivity to videos you’ve created yourself in WeVideo, or existing videos from YouTube or Vimeo.
Select your desired video, then click Done to begin adding interactive elements.
Pro tip: Want more on using WeVideo's Interactivity tools? Check out our tutorial playlist in WeVideo Academy.
2. Add interactions
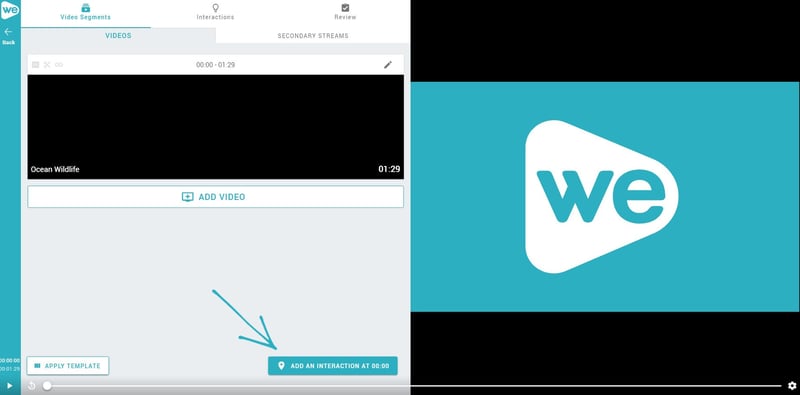
Once you’ve selected your video, you’ll be brought to our interactive design studio where you can:
- Add interaction points
- Add additional videos
- Add secondary video streams (picture-in-picture)
- Apply pre-existing interaction templates for faster design time
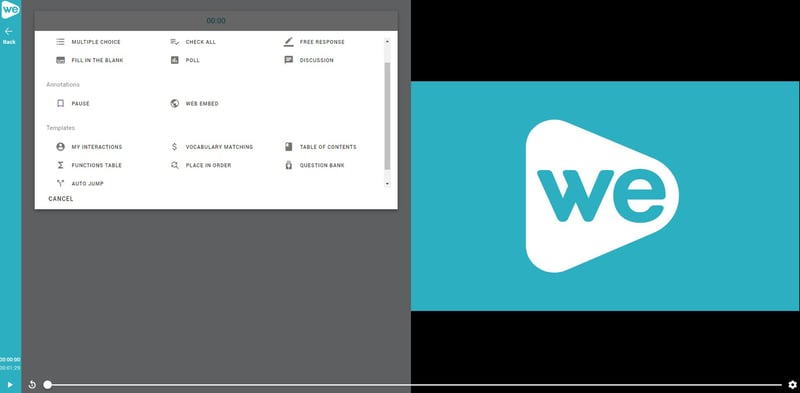
Use the bottom slider to select the timestamp where you’d like to place an interaction. Then click Add an interaction. From there, you’ll be able to choose a variety of interaction types, including:
- Multiple choice
- Check all
- Free response
- Fill in the blank
- Poll
- Discussion
- Pause
- Web embed
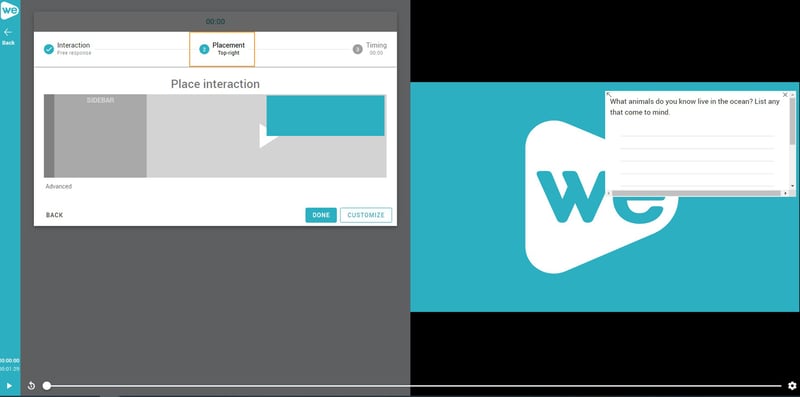
When you add an interaction, you choose where it appears in your video. Click Advanced to control whether or not:
- Interaction is required
- Interaction pauses video playback
- Learners can rewind after reaching this interaction
- Allow more than one attempt
- Learners can upload attachments when answering this interaction
When you’re all set, click Done to add the interaction to your video.
Repeat this step until you’ve added all of your interactions.
3. Assign to learners
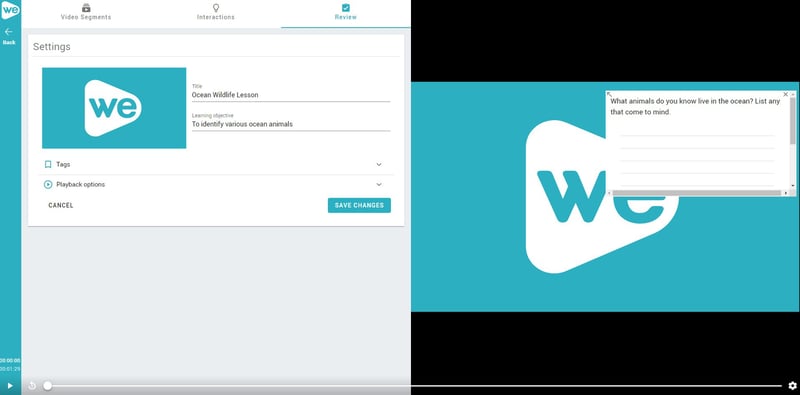
Once you’re done creating your interactive video, click Review in the top toolbar. From there, you’ll be able to title your video, as well as include a learning objective.
Click Tags to add keywords/tags and choose a target audience and/or subject. This is particularly useful for shared accounts, or for better organizing your video library when creating a large quantity of interactive video content.
Click Playback options for a host of further customization options as your learners engage with the content.
Click Preview to view your content as a learner.
Click Save and exit to finalize your video. Then, when you’re ready, use the Actions menu (three stacked dots) to assign to classes.
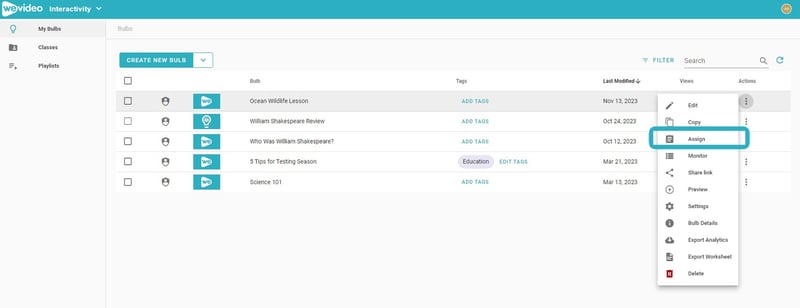
Because interactivity is part of WeVideo’s larger toolset, it’s super simple to assign your interactive content to pre-existing WeVideo classes.

Just click Assign, select your class(es) and start/end date, then click the Assign button in the top right corner. Assigning a video will also auto-generate a link that can be shared with students.
Pro tip: District WeVideo plans offer the ability to use interactivity for professional learning, or to assign videos to people outside of your organization, as well as to anonymous participants (no account or information needed to participate).
4. Analyze the results
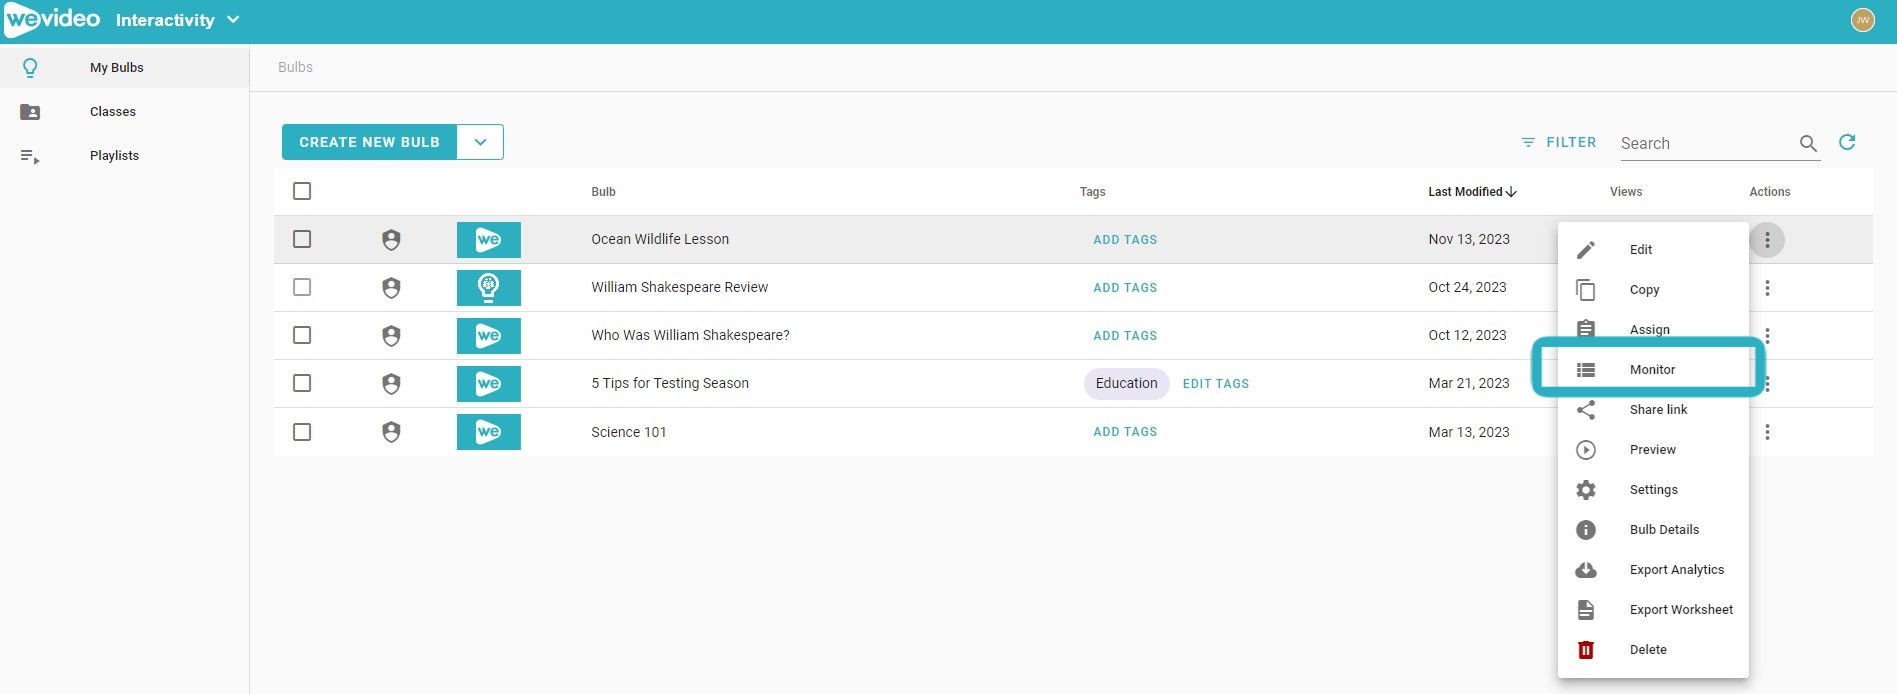
Lastly, use the Actions menu to Monitor your Bulb’s (interactive video) performance. As learners engage with your content, you’ll get real-time results. Use to influence and inform future lessons, plus export analytics for sharing and further evaluation.
That’s a wrap. How to make an interactive video in just a couple of steps. Again, whether this is your first or fiftieth interactive video, there’s never been a better time to make your instruction as dynamic as possible with content that learners crave. Good luck creating!